Friday, 12 December 2008

Hand in day

Today was the final day of the animation module. I found that going through this module I have learnt a lot. There are a lot of new thing tools and options that I now know about max that I didn’t know before I did this module. On our last day we decide to put the animation together and add the final audios too.

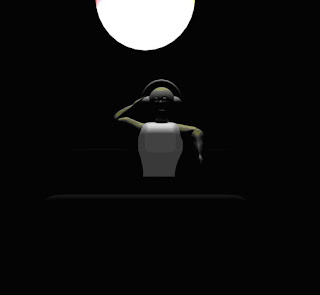
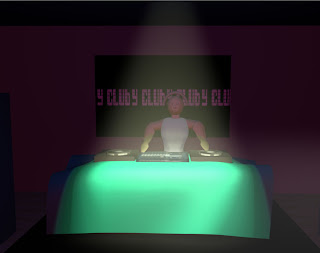
I had to remake the DJ scene as the arm was distorted, so I had to import the character into a new drum n base scene and add new bones and attached them to the body by the skin modifier. Once this was done I animated the character again and then rendered it.
The entire animation was now rendered and put together in movie maker. Once that was done the audios were added from Audition.

I have enjoyed doing the module but at times have got to a point where I felt like giving up, as it can get very frustrating when something doesn’t work. For just doing what we did takes up a lot of time to do it. I first thought modelling was hard and took along time to create but now am efficient and find that I can model a lot quicker than I could before. I found that creating characters and adding bones took along time to do and when animating that the amount u animated isn’t as long as you think it is.
I remembered how to use the cloth modifier by going through a tutorial from YouTube with my group member John

I have learned the types of lighting effects you can add by adding the volume light. How I can use the camera to add angles by adding path constraints or just by moving it on it’s own and key framing it. I’ve have learnt how to put multiple materials on one object by setting it different ID’s.

Before this module I had never used these tools, modifiers and etc…
Skin modifier
Hair and fur modifier
Animation
Path constraint
Adding bones
Biped
Volume light effect
Edge and wire materials and more through the tutorials that I had done.
Multiple materials
Cloth modifier

Thursday, 11 December 2008

Rock Y dancing

Today I had completed the dancing rock y and now had started to render both scenes and we found out that there was a better quality to render them in, which we did so I had to re-render my DJ scene again, which I didn’t mind as we needed a close up instead of the whole room which was empty.


Wednesday, 10 December 2008

fall over scene

Today we had to present what we had done so far to our clients at the YMCA. Before we went there we went through to see what we had done any scenes we had not finished we rendered a single image so we could show them what we had planned to do. They seemed really happy with what we had done, which I found was something that was good to hear knowing that everything we had done was not a waste of time.

We went back to class and went onto finish off the final scenes, I now had to animate the Y character falling over I did this by rotating the building from one way to the other and animated the y waving from one side to the other too and then got him to fall over.
Once this scene was done I had started on the final scene, which was to animate the rock y dancing in the club and have the camera spanning around the room around the band but still aiming towards the Y, as it’s moving around.

Friday, 5 December 2008

path constraints and camera's

My scene was done so I decided to help out my group member with his. I had learnt a new tool allowing you to create a camera and attached a path constraint. So I created a path by using the line tool and put it into the intro scene and experimented around with it until I got the appropiate angles.


Once this was done I then helped him out to do the same thing for the scene where the girl characters is picking up the lego. Having the camera come around her. By the end of the day Ben and me had rendered four scenes.

Saturday, 29 November 2008

First animation

Now I had to animate the character to do this I had to merge it with the drum n base scene I tried to do this but for some odd reason the character was stretched across the screen. I then tried to export it and import but found that the skin modifier was removed and had to add a new one. Once I had done this I went to animate the character and found the arms were stretching a lot further than normal so I knew there was something wrong. To solve this problem I merged the scene into the animated character instead of the other way.
This worked perfectly fine the only problem I had was that the lighting had lost the effects it had in the room before it was merged in.


I selected the bones and moved them from one side to another at the same time had auto key selected allowing to move the arm to an angle and then go to another frame and move the arms again with having to press the key frame manually.
This was the first time I had animated in 3D max I liked it but found it odd at times.

Tuesday, 25 November 2008

Problem of character


By now the designing of the character was getting frustrating as I felt that once I had solved one problem I had another one straight after. But I had then finally sorted out the character, but now had to animate him, but before I did this I wanted to add hair to the character to do this I had to us e a new modifier I had not known about which was the hair and fur modifier. I played around with this until I got a good hairstyle, the tool allowed me to have the hair down long, change colour and etc…

The only problem about this was that it made the rendering time a lot longer. So in the end we decided not to use it. Might have been a waste of time but its something new I had learnt.

Friday, 21 November 2008

Biped and bones


Today I was trying to animate the character, but first had to make sure everything was linked meaning bones and arms to the body. Some reason the head would not link to the body and some of the other bones were not working too.


I tried boning from beginning to see if that solved the problem but it didn’t so I tried another method, which allows you to move a character and the new method is called biped, which is a human skeleton, but found that this was not suitable for my character and tried to see if I could solve out the problem.


The day ended with me frustrated that I couldn’t solve the problem. The good points of the day were the fact that I had now learned a lot of new tools about 3D max. I had never known that there was such an option of bones and biped to animate a character and that to attaché the bones you needed to use the skin modifier. These were the only pluses I could take on for the day.