Saturday, 29 November 2008

First animation

Now I had to animate the character to do this I had to merge it with the drum n base scene I tried to do this but for some odd reason the character was stretched across the screen. I then tried to export it and import but found that the skin modifier was removed and had to add a new one. Once I had done this I went to animate the character and found the arms were stretching a lot further than normal so I knew there was something wrong. To solve this problem I merged the scene into the animated character instead of the other way.
This worked perfectly fine the only problem I had was that the lighting had lost the effects it had in the room before it was merged in.
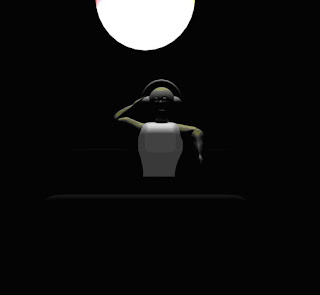

I selected the bones and moved them from one side to another at the same time had auto key selected allowing to move the arm to an angle and then go to another frame and move the arms again with having to press the key frame manually.
This was the first time I had animated in 3D max I liked it but found it odd at times.

Tuesday, 25 November 2008

Problem of character


By now the designing of the character was getting frustrating as I felt that once I had solved one problem I had another one straight after. But I had then finally sorted out the character, but now had to animate him, but before I did this I wanted to add hair to the character to do this I had to us e a new modifier I had not known about which was the hair and fur modifier. I played around with this until I got a good hairstyle, the tool allowed me to have the hair down long, change colour and etc…

The only problem about this was that it made the rendering time a lot longer. So in the end we decided not to use it. Might have been a waste of time but its something new I had learnt.

Friday, 21 November 2008

Biped and bones


Today I was trying to animate the character, but first had to make sure everything was linked meaning bones and arms to the body. Some reason the head would not link to the body and some of the other bones were not working too.


I tried boning from beginning to see if that solved the problem but it didn’t so I tried another method, which allows you to move a character and the new method is called biped, which is a human skeleton, but found that this was not suitable for my character and tried to see if I could solve out the problem.


The day ended with me frustrated that I couldn’t solve the problem. The good points of the day were the fact that I had now learned a lot of new tools about 3D max. I had never known that there was such an option of bones and biped to animate a character and that to attaché the bones you needed to use the skin modifier. These were the only pluses I could take on for the day.


Tuesday, 18 November 2008

Role change

Today my role was changed from doing the rooms to doing the model man. This is because my group member was getting frustrated and felt that it would be good to do something different. So he left off from where I did and added his touches to the rooms and I tried to see if I could solve his problem. We also did this as we felt it would allow us to gain more experience in different areas of Max
The character arms were for some reason blacked out.


I went through the process of cloning one arm and boning it again, but found that the same thing was happening. Carried on and finally decide to delete all the bones and start from scratch and now the arms were showing up perfectly fine when I loaded up the file again.


Before I had solved this I tried creating new arms by extruding from the body and using the bevel tool too. I’ve used the extrude tool before but had never known what the bevel tools does but now I do.

Friday, 14 November 2008

Drum set

The disco ball was added to the drum n base night. Then I started to create the drum set for the rock night. Using boxes, cylinders, cones and more, did this. I created one drum and cloned it until I had enough. To create the drums set I first went online and based the drum set on a picture I found from Google images.

Lego, disco ball and microphone

The first room had a bit left to do which was to create the lego walls. Using a box and a cylinder that were combined together to give the user an impression of a logo did this. Once I had done one I cloned it and change the colour. This step was repeated twice more until I had four different colours. I then stacked them on top of each other and cloned and put them into place until I got a big enough wall to cover the sides of the rooms.


I had finished doing the first room so I started creating some objects for the rock night. The first things I wanted to create were a microphone and a disco ball. To do these both I went through two different tutorials. When going through the tutorials I had learnt the different types of textures there were available for me to use.


Tuesday, 11 November 2008

First design in max

We were now into week 8 and I had created the first internal room. It was just the basic modelling.


Once the modelling was done textures were added. I had shown this to my group members who liked it, but wanted the speakers to be animated. So I created a new speaker. The speakers were made out of three box sides with the front side being booleaned by a cone.


Week 7 Presentation

We had to present our ideas in front of the class. Me Ben and John went up and explain our storyboards and the theme we have chosen to do. It allowed us to see the kind of ideas everyone else was thinking of doing. A lot the ideas had characters which were the letters from the YMCA logo. But it was good to see what kind of different ideas they had in mind to use the characters for.
After the presentation we had all talked about what we had to do for the next coming weeks.